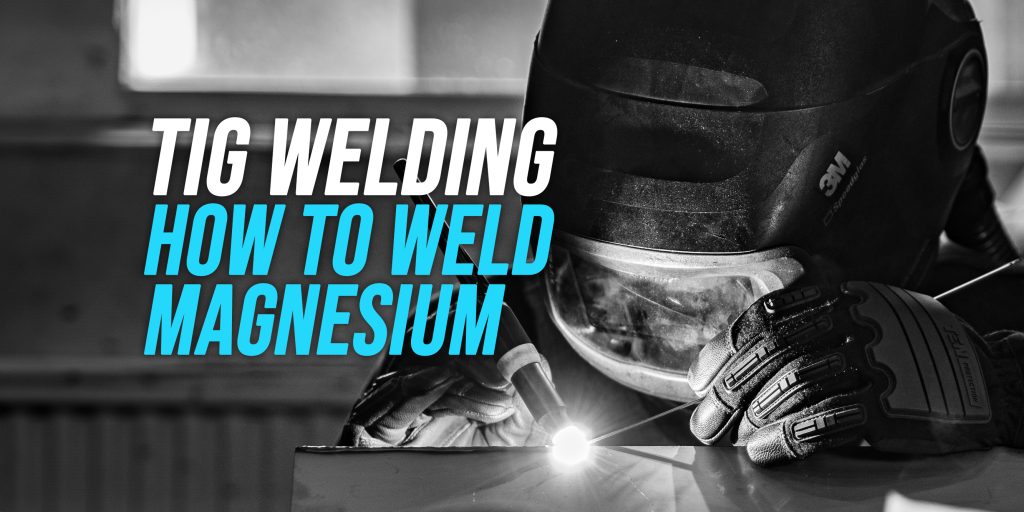
How to TIG Weld Magnesium [Explained]
Welding magnesium is not for the faint-hearted. Unlike more common metals, magnesium presents a set of unique challenges.
It’s highly reactive, prone to burn if not handled with care, and requires precise control of heat and technique to produce strong, quality welds.
This article will delve deep into these challenges and guide you through overcoming them, ensuring that you’re well-prepared to tackle magnesium welding projects with confidence.
Why take on the challenges of TIG welding with magnesium?
The benefits are worth the effort. Magnesium alloys are prized for their exceptional strength-to-weight ratio, corrosion resistance, and versatility.
They find applications in industries where lightweight yet durable materials are essential, such as aerospace, motorsports, and more.
By mastering magnesium welding, you’re positioning yourself to work on cutting-edge projects that demand the highest standards of craftsmanship.
Safety Precautions
Safety should always be your top priority when TIG welding with magnesium. To protect yourself from potential hazards, ensure you have the right protective gear. This includes:
- Welding helmet with a proper shade for magnesium welding (usually shade 10-12).
- Flame-resistant welding jacket or apron.
- Welding gloves that provide heat and spark protection.
- Closed-toe leather boots to shield your feet from sparks and hot metal.
- Welding cap or beanie to protect your head from heat and sparks.
- Safety glasses or goggles for additional eye protection.
Always inspect your gear for wear and tear before starting a welding project. Remember, investing in high-quality protective equipment is an investment in your safety.
Ventilation and Fume Control
Welding any metal, including magnesium, produces harmful fumes and gases. Proper ventilation is essential to maintain a safe working environment. Follow these ventilation guidelines:
- Weld in a well-ventilated area, ideally outdoors or in a dedicated welding booth with an exhaust system.
- Use a fume extractor or welding fume respirator to filter and remove hazardous fumes.
- Keep bystanders and non-essential personnel away from the welding area to minimize their exposure.
Adequate ventilation not only protects you but also those around you from the potentially harmful effects of welding fumes.
Fire Safety and Extinguishing Magnesium Fires
Magnesium is highly flammable and can ignite at relatively low temperatures. It’s crucial to be prepared to deal with magnesium fires. Here’s what you should know:
- Have a Class D fire extinguisher on hand specifically designed for metal fires, including magnesium.
- Never use water to extinguish a magnesium fire, as it can exacerbate the situation.
- If a magnesium fire occurs, use the proper extinguisher or cover it with sand or a Class D fire blanket to smother the flames.
- Have a clear evacuation plan in place, and ensure everyone in your vicinity knows how to respond to a magnesium fire emergency.
Being proactive about fire safety is non-negotiable when working with magnesium.
Health Risks and How to Minimize Them
Welding, in general, poses health risks, and magnesium welding is no exception. To protect your health while welding with magnesium:
- Avoid breathing welding fumes by using a respirator with appropriate filters.
- Weld in a well-ventilated area or use local exhaust ventilation to remove fumes at the source.
- Minimize skin exposure to hot metal and sparks by wearing protective clothing.
- Be aware of the symptoms of magnesium exposure, such as metal fume fever, and seek medical attention if necessary.
Equipment and Materials
| Topic | Details |
|---|---|
| A. Selecting the Right TIG Welding Machine | When TIG welding magnesium, choose a welding machine that offers precise control over amperage and a stable, low-current arc. Look for features like high-frequency start and pulse welding capabilities to enhance control. Ensure that your machine is compatible with both AC and DC welding, as magnesium typically requires AC welding. |
| B. Tungsten Electrode Selection | Selecting the appropriate tungsten electrode is crucial. Thoriated tungsten electrodes (2% thorium) are commonly used for magnesium welding because they can withstand the high heat generated. However, be aware of the potential health risks associated with thorium and take appropriate safety precautions. |
| C. Filler Metal Choices | The choice of filler metal depends on the specific magnesium alloy you are welding. Common choices include AZ61A and AZ92A for casting alloys, and AZ31B for wrought alloys. It’s essential to match the filler metal to the base metal to achieve strong and reliable welds. |
| D. Gas Selection and Flow Rates | Use a shielding gas appropriate for magnesium welding, typically a mixture of argon and helium. The exact ratio depends on your specific application and the welding machine you’re using. Typical flow rates range from 15 to 30 cubic feet per hour (cfh), but consult your machine’s manual for precise recommendations. Proper shielding gas coverage is critical to prevent contamination and ensure quality welds. |
Pre-Welding Preparation
Before you even strike an arc, meticulous cleaning and surface preparation are vital for successful magnesium TIG welding. Follow these steps:
- Remove any oils, grease, paint, or contaminants from the magnesium surfaces using a degreaser or acetone.
- Use a stainless steel wire brush or dedicated cleaning tools to scrub the joint areas thoroughly.
- Ensure that the base metal is dry before welding, as moisture can negatively affect the weld quality.
Remember, even the smallest trace of contamination can lead to welding defects, so take your time to prepare the surfaces properly.
Tack Welding Techniques
Tack welding is essential for aligning and securing your workpieces before making the final welds. Here’s how to do it right:
- Use small filler rods or tack welds to hold the parts together, ensuring they are aligned according to your joint design.
- Make sure the tacks are evenly spaced to prevent distortion during the final weld.
- Keep tack welds small to minimize heat input and avoid over-softening the magnesium base metal.
Proper tack welding ensures your workpieces stay in position throughout the welding process, resulting in more precise and structurally sound final welds.
Setting Up Your Work Area
Your work area should be organized and equipped for efficiency and safety:
- Ensure your welding machine is set up correctly, with all safety features enabled.
- Have a designated area for storing and handling filler metals, electrodes, and gas cylinders.
- Keep fire-extinguishing equipment, such as a Class D fire extinguisher, readily accessible.
- Maintain a clean and clutter-free work environment to prevent tripping hazards and accidental fires.
A well-organized work area promotes productivity and minimizes the risk of accidents.
Joint Design and Fit-up Considerations
Proper joint design and fit-up are crucial for producing strong and aesthetically pleasing magnesium welds:
- Choose appropriate joint configurations, such as butt joints, lap joints, or T-joints, based on your welding project.
- Ensure proper gap and alignment between the joint components, as specified by your welding procedure.
- Use appropriate fixturing or clamps to hold the workpieces securely in place during welding.
TIG Welding Techniques for Magnesium
Proper Torch Angle and Travel Speed
Achieving the right torch angle and travel speed is critical for successful magnesium TIG welding:
- Torch Angle: Maintain a 15 to 20-degree angle between the torch and the workpiece. This angle ensures proper gas coverage and heat distribution.
- Travel Speed: Control your travel speed to achieve a consistent bead width and penetration. A steady and uniform speed is essential to avoid overheating and burn-through.
Practice maintaining the correct torch angle and travel speed on scrap pieces before tackling your actual welding project.
Controlling Heat Input
Magnesium is sensitive to heat, and controlling the heat input is essential for preventing problems like burn-through and distortion:
- Start with low amperage and gradually increase it until you establish a stable arc.
- Use the pulse welding function if your machine has it, as it helps control heat input and reduces the risk of overheating.
- Monitor the base metal temperature by periodically touching it with a non-conductive material, like a wooden block. If it’s too hot to touch, reduce the amperage or take breaks to let it cool.
Consistent and precise control of heat input is key to producing quality magnesium welds.
Puddle Control and Bead Formation
Achieving proper puddle control and bead formation is an art in magnesium TIG welding:
- Focus on creating a small, well-defined weld puddle.
- Move the torch in a controlled and steady manner to maintain the desired bead shape.
- Use a weaving or oscillating motion to evenly distribute heat and create a uniform bead profile.
Pay close attention to the puddle’s appearance and adjust your technique accordingly to achieve the desired results.
Avoiding Cracking and Distortion
Magnesium is prone to cracking and distortion, making it crucial to take preventive measures:
- Employ proper joint preparation and fit-up techniques to minimize stress concentrations.
- Use the lowest possible amperage that still provides adequate penetration to reduce heat input.
- Post-weld heat treatment can help relieve residual stresses and reduce the risk of cracking and distortion, especially for thicker materials.
Troubleshooting Common Issues
| Issue | Troubleshooting Tips |
|---|---|
| A. Burn-Through and Porosity | 1. Reduce amperage or increase travel speed to lower heat input. 2. Use a smaller tungsten electrode to concentrate the heat. 3. Adjust the gas flow rate to improve shielding and reduce oxidation. 4. Ensure proper joint fit-up and avoid gaps that may lead to burn-through. |
| B. Tungsten Contamination | 1. Maintain a consistent and correct torch angle to prevent tungsten from contacting the weld pool. 2. Keep the tungsten sharp by grinding it with a dedicated wheel. 3. Minimize the use of filler metal to prevent contamination during filler rod dipping. 4. Implement a dedicated tungsten storage system to prevent contamination between uses. |
| C. Inconsistent Bead Appearance | 1. Ensure a steady and uniform travel speed. 2. Maintain a consistent torch-to-work distance. 3. Adjust the torch angle to distribute heat evenly. 4. Check gas flow rates and shielding gas purity. 5. Inspect the tungsten electrode for signs of wear or contamination. |
| D. Addressing Welding Imperfections | 1. Identify the specific imperfection (cracks, undercut, lack of fusion, etc.). 2. Determine the root cause, such as improper technique, inadequate heat control, or poor joint preparation. 3. Make the necessary adjustments in your welding process. 4. If the imperfections persist, consider post-weld heat treatment or consult with an experienced welder for guidance. |
Post-Welding Procedures
After completing the welding process, it’s essential to follow these steps for post-weld cleaning and inspection:
- Allow the weld to cool naturally to room temperature before handling it.
- Use a stainless steel wire brush or dedicated cleaning tools to remove any residual flux or slag from the weld bead.
- Inspect the weld visually for any signs of defects, such as cracks, porosity, or incomplete fusion.
- Perform non-destructive testing methods like dye penetrant or X-ray inspection, especially for critical applications.
Thorough cleaning and inspection ensure that your welds meet the required quality standards and are free from imperfections.
Heat Treatment Options
Depending on the specific magnesium alloy and application, heat treatment may be necessary to relieve residual stresses and improve the mechanical properties of the weld. Common heat treatment options include:
- Solution Heat Treatment: This involves heating the welded part to a specific temperature and then quenching it to achieve the desired properties.
- Aging: After solution heat treatment, aging at a lower temperature can further enhance the alloy’s strength and hardness.
- Stress Relief: Stress relief heat treatment can help minimize distortion and reduce the risk of cracking in large or complex weldments.
Consult the welding procedure specification and material specifications to determine the appropriate heat treatment for your project.
How to Verify the Quality of Your Welds
Ensuring the quality of your magnesium welds is paramount, and there are several ways to verify it:
- Visual Inspection: Examine the weld for visible defects, such as cracks, porosity, undercut, or incomplete fusion.
- Non-Destructive Testing (NDT): Employ NDT methods like ultrasonic testing, radiographic testing, or dye penetrant testing to detect hidden flaws.
- Mechanical Testing: Conduct mechanical tests, such as tensile tests or hardness tests, to assess the weld’s mechanical properties.
- Consult Welding Codes and Standards: Follow relevant industry standards and specifications to ensure compliance and quality assurance.
Verification of weld quality is crucial for safety and performance in critical applications.
TIG Welding Magnesium Tips from Seasoned Welders
There’s no substitute for the insights of experienced welders. Here are some valuable tips from seasoned magnesium TIG welders:
- Continual Learning: Stay updated with the latest techniques and equipment in magnesium welding.
- Practice on Scrap: Keep a stock of magnesium scrap pieces to practice on and refine your skills.
- Join Welding Communities: Connect with other welders to exchange experiences and gain insights into troubleshooting and best practices.
- Be Patient: Magnesium welding can be challenging, so patience and perseverance are your allies.
Conclusion
By mastering the techniques and best practices outlined in this article, you’ve equipped yourself with the skills to tackle projects demanding magnesium alloys’ exceptional properties.
Remember that welding, especially with magnesium, is a lifelong learning process.
The more you practice and refine your skills, the better you’ll become. Stay curious, seek out opportunities to learn from experienced welders, and don’t be afraid to push your boundaries.
Each project will bring new challenges and opportunities for growth.
Frequently Asked Questions
Is TIG welding magnesium more challenging than other metals?
Yes, TIG welding magnesium can be more challenging due to its high reactivity, susceptibility to burn-through, and the need for precise heat control. However, with the right skills and knowledge, it can be mastered.
How do I ensure my magnesium welds meet industry standards and specifications?
To ensure compliance with industry standards, always consult the relevant welding codes and specifications for magnesium welding. Conduct visual inspections, non-destructive testing, and mechanical tests as needed to verify weld quality.
Are there any safety precautions specific to magnesium welding I should always follow?
Absolutely. When welding magnesium, prioritize safety by using appropriate protective gear, ensuring proper ventilation, having a Class D fire extinguisher on hand, and being aware of health risks associated with magnesium fumes. Always be prepared to address magnesium fires safely.


![Robotic TIG Welding [Everything You Need to Know!]](https://weldingwatch.com/wp-content/uploads/2023/12/Robotic-tig-welding-machines-768x384.jpg)
![DC TIG Welding [Everything You Should Know 2024]](https://weldingwatch.com/wp-content/uploads/2023/12/DC-TIG-Welding-768x384.jpg)
![How to TIG Weld Nickel Alloy [Explained]](https://weldingwatch.com/wp-content/uploads/2023/12/Tig-Welding-nickel-alloy-768x384.jpg)
![How to TIG Weld Stainless Steel [Explained]](https://weldingwatch.com/wp-content/uploads/2023/12/Tig-Welding-stainless-steel-768x384.jpg)